Essential Warehouse Management System Features

When it comes to choosing the right warehouse management system (WMS) for your business, it’s important to understand your warehouse needs and the key features that benefit company’s with an integrated WMS system.

Key Features to look out for when researching WMS systems include:

  1. Complete back end office integration with your accounting system.  Substantial gains in efficiency are enjoyed when your WMS system has full integration with the Inventory, Order Entry and Purchase Order Modules.  This eliminates the need for duplicate entries between the WMS system and the accounting system.
  1. Integration with radio-frequency and bar coding technologies.  Radio-frequency (RF) scanners used in conjunction with bar coding allow workers to scan items that picked, packed and shipped or put away.  This expedites the amount of time needed to manually mark off items picked on a picking ticket and moves your operation towards a paperless office.
  1. Real-time inventory updates.  The RF scanners provide the advanced technology to push inventory updates at the time of pick, pack and ship up to the inventory module.  This allows your sales and inventory management staff to know what inventory they have on hand at all times.  RF scanners also provide instant notification if communication is lost with the network.  RF scanners are the preferred methodology in most warehouse environments as they replace the serial scanners that must be synchronized and uploaded on the network manually.  With serial scanners your company is precluded from having real time inventory and the risk of data loss is larger.
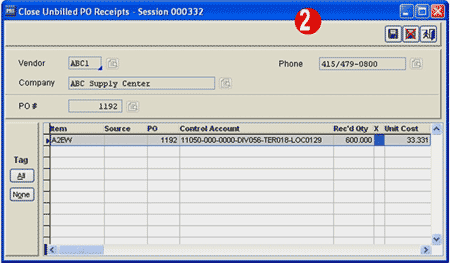
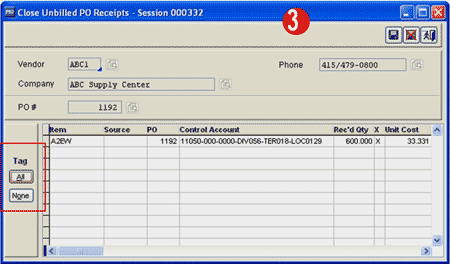
  1. Automation of inventory receipt and put-away.  A WMS system should have the capability to track where inventory is at all times.  It should include inventory location by bin and quantities stored in each bin.  In order to ensure that the proper items are being received, integration with the purchasing system is needed.  Purchase orders should flow into the WMS system and reside there until the inventory on that purchase order is received and stored in its proper location.
  1. Support for multiple picking methods.  Every company does not pick inventory using the same methodologies.  How inventory is picked in a soft goods environment such as a clothing distributor would be very different than in a hard goods environment such as an appliance or lumber yard.  Some companies even have different picking methodologies within their own warehouse depending on the size, value or type of goods (hazardous-materials) being picked.  It is very important to ensure that ensure that the WMS system your company procures has multiple picking methods available.
  1. Compliance labeling, EDI integration and ASN labeling are available.  More and more customer companies such as Wal-Mart are placing demands on distributors and wholesalers to comply with their standards in order to continue the business relationship.  Whether your company has established the need today or may have the need in the future, it is paramount to ensure that the WMS system your company procures has many labeling methodologies available.
  1. Advanced Reporting Systems.  Most WMS systems include standard reports.  However, your WMS should include a robust reporting capability that supports the design of ad hoc reports.  This is essential for management so that critical information can be made available in a timely manner to support their business decisions.
  1. Advanced BIN Systems.  A WMS system should allow for bins to be designated as different types.   Some of the different
    1. Pickable – meaning goods stored in that bin are available for picking.
    2. Non-dedicated – meaning multiple goods can be stored in the same bin.
    3. Dedicated – only a particular item can be store in that bin (such as peanut oils).
    4. Storage – items placed in these bins are not pickable.  Typically the top racking in the warehouse is not a pickable location as it can be dangerous and non-efficient.   The goods stored in these bins are used to replenish pickable bins.
    5. Virtual bins – most companies unload trucks or stage goods for shipping in virtual bins in the shipping and receiving areas.
  1. Automated inventory control features.  A WMS system should be able to track inventory and dispense inventory in different methods such as FIFO, LIFO and expiry date.  Additionally, it should be automated to allow for replenishment of goods in pickable bins to ensure that order picking does not have to stop as bins needs refilled with items.
  1. Scalability.  The WMS system being procured should not only meet all the needs of your company today but also be able to fill future needs.  Compliance labeling, EDI integration, additional users, increased warehouse space or adding additional locations are a few of the issues that should be considered when looking at how scalable the system is.

If you need assistance or would like more information on the steps needed to start the search for a WMS system, please feel free to contact us at info@axisgp.com.  Hopefully this article has provided some insight on preparing your organization to begin a search to improve their warehouse operations to gain efficiencies.

Posted in July 2007, Newsletter | Tagged , , , , | Leave a comment

What’s New in Sage Pro ERP 7.4

In the latest release of Sage Pro ERP 7.4, there are 5 new features in Purchase Orders that make this module more flexible and easier to use than ever before.

The first new feature, which is the ability to edit the ship-to information on purchase orders generated from blanket orders, is very exciting. This will simplify the generation process as well as provide much needed flexibility.  The ship-to can be edited either when the blanket order is released (and thus a new purchase order is created) or after the blanket order is released.

To edit the ship-to, select Transactions > Change or Void Orders. Enter the purchase order number that was created from the blanket order.

1. Select Edit Header and then type in the ship-to information.

The second new feature also relates to the release of blanket orders. Users can now change the header information and comments after the blanket order has been released. This makes the blanket order release more flexible than ever before.

The third new feature is the retention of purchase order addresses after the period is closed and the data archived. This allows for reprinting of purchase orders as well as the copying of an archived purchase order to an active purchase order.

The fourth new feature is enhancements to the Close Unbilled PO Receipts screen. Two new buttons have been added: Tag All and None. Also, a hotkey <CTRL + E> has been added that will pop up the Select GL Account screen.

To access the Close Unbilled PO Receipts screen, go to Accounts Payable > Transactions > Close Unbilled PO Receipts.

2. Enter the purchase order number that is going to be closed.

3. Select the line items to be closed, or click on the Tag All button.

If the control account needs to be changed, that can be done with the new hotkey.

4. Enter a <CTRL + E> and then select the correct General Ledger account. Select save when the process is complete.

The fifth new feature is an improvement on the bid purchase order system and includes the ability to:

  • review bid history
  • generate multiple purchase orders from the same bid
  • combine multiple bids on the same purchase order
  • allow the users to select the bid line items to include on the purchase order
  • allow the users to adjust the quantities and costs

Select Transactions > Change or Void Orders. Enter the bid purchase order number that is being converted.

5. Select the Convert button.

6. If the New #-Auto is selected, the purchase order number from this bid will be the next sequential purchase order number. If Reuse#-Auto is selected, the purchase order from this bid will be the same as the bid number.

7. If Manual is selected, this screen appears. The user is given the option of creating a new purchase order or adding to an existing order. The existing purchase order does not have to be created from a bid, but it must be a purchase order for the same vendor as the bid. This is also the screen that allows users to select line items to be added to the purchase order by clicking on the Select Line button.

As this article shows, the new features in the Sage Pro ERP 7.4 Purchase Order module provide flexibility and ease of use to one of the core operating modules.

If you have any questions or need additional assistance, please contact your AXIS consultant or email us at info@axisglobalpartners.com for more information.

Posted in July 2007, Newsletter | Tagged , , , , , | Leave a comment

Attention Sage HR Users– EEO-1 Report Revision Notice

The US Department of Labor has issued the following notice:

Beginning in 2007, employers, including Federal contractors, will collect and report data about the racial, ethnic, and gender composition of their workforces on a revised Standard Form 100, Employer Information Report EEO-1. The revised EEO-1 report must be filed for the first time in calendar year 2007 by September 30, 2007.

These requirements applies to employers with 100 or more employees and federal contractors with 50 or more employees and a $50,000 federal contract must provide an annual count of their employees by job category and ethnicity, race, and gender in an EEO-1 Report.  Not being in compliance could result in many negative outcomes, and for those who are federal contractors and subcontractors, it may result in termination of federal government contracts and debarment from future federal contracts.

The existing EEO-1 report calls for workforce data to be broken down by nine job categories, using five race and ethnic categories. The revised EEO-1 report contains changes to the race and ethnic categories. A new category titled "two or more races" has been added, and the category "Asian or Pacific Islander" has been divided into two separate categories – "Asian" and "Native Hawaiian or other Pacific Islanders." In addition, the approved revisions include an increase in the number of job categories as a result of dividing the Officials and Managers category into two subgroups – Executives/ Senior Level and First/Mid Level Officials. These and other changes are discussed in the Federal Register notice published on November 28, 2005 (70 FR 71294); available on EEOC’s website at http://www.eeoc.gov/eeo1/index.html

The revisions to the EEO-1 job categories may also necessitate changes in the regulations implementing Executive Order 11246. The current regulations require contractors to collect, maintain, and report information about the gender, race, and ethnicity of their employees – Blacks, Hispanics, Asians/Pacific Islanders, and American Indians/Alaskan Natives – using the same categories on the current EEO-1 report form.

Current HR system users may need to upgrade before September 30th to the latest version of Sage Accpac HRMS or Ascentis HR (Previously ACCPAC HR) to have the proper compliance reporting.  Please contact your local AXIS office to determine if this applies to your company.  If your company does not have an HR system and you need assistance or would like more information on the steps needed to start the search for a HR system, please feel free to contact us at info@axisgp.com.

Posted in July 2007, Newsletter | Tagged , , , , , , | Leave a comment

Frequently Asked Questions

Sage
Accpac ERP

Q – Can I configure Accpac to automatically post the resulting General Ledger batch after posting the Accounts Receivable batch?

A – To configure Accounts Receivable to post the General Ledger batch please follow these steps:

  1. Under A/R Options, open the G/L Integration window.
  2. Select “Creating and Posting a New Batch” from the drop down menu next to the Create G/L Transaction By option.
  3. Click on the Save button. Make sure all users have their Accpac windows closed in order to save the changes.

Q – When a financial report is run with the Drill down Information selected, a comment box saying “Right-click and choose FR…” will be displayed for every cell that has drill down. This can cover the whole spreadsheet if there are many columns. Is there a way to turn this off?

A –To remove the comment boxes:

  1. In Tools Menu in Excel select Options
  2. Select view
  3. In the comments section, select comment indicator only
Sage Accpac
CRM

Q – I would like to add a field into an email template that I am creating, but the field I want to add is not listed in the “Choose Field to insert into the E-mail” list.  Is there a way to add the field to the list?

A – First, you need to determine the Field’s Column Name:

  1. In CRM, click Administration then Customization.
  2. In the Customization screen, click Translations.
  3. Select the option Inline Translation Mode. Doing so will add an asterisk to all the fields.
  4. Go to the screen where the field that needs to be added to the e-mail template is located.
  5. Locate the field and click the asterisk next to the field.  This will popup a Translation window.
  6. Make a note of the value in the Caption Code field. This value is the field name.
  7. Return to the Translations screen and de-select the Inline Translation Mode option.

Next, you will need to insert the Field into the Template:

  1. Click  Administration then E-mail and Documents.
  2. Click E-mail Templates.
  3. Click New or click an existing e-mail template where the field will be added.
  4. Type the field name in between pound signs (#) in the subject or body of the e-mail.  For example, #user_mobile#.
  5. Repeat the steps above as needed. Once finished, click Save.

Q – How can you select multiple e-mail address when sending outbound email message in CRM?

A – First, you need to make sure you have the proper e-mail screen position selected:

  1. In the Main Menu, click My CRM.
  2. Click the Preferences tab.
  3. Click Change.
  4. In the E-mail Screen Position: field, select either "Split" (recommended) or "Popup."
  5. Click Save.

Now you should be able to select multiple e-mail addresses:

  1. Find the company that contains the people’s e-mail addresses.
  2. Select the company to see its details in the Summary tab.
  3. Click the People tab.
  4. Click one of the e-mail addresses to open the e-mail screen.
  5. If a split e-mail screen comes up, the top half of the screen should continue to display the people’s e-mail addresses.  However, if a popup screen is used, move the screen so that the rest of the e-mail addresses are visible.
  6. Click on the second email address and repeat the step as required.
Sage Pro ERP

Q – How do I know what privilege is required to run a process in Sage Pro ERP?

A – Process IDs (Also referred to as privileges.) are assigned to each user in Sage Pro ERP to allow access to companies and applications. Process IDs also allows access to processes that include entering cash receipts, shipping sales orders, and receiving purchase orders.

If a user does not have the required Process ID for a process, a message will appear indicating either the process cannot be accessed or permission is required to complete a process. To determine which Process ID is required for a specific process for versions prior to Sage Pro 7.4, users must look through a list of privileges from the Select Privileges screen (Refer to the "Assigning Privileges" section of the System Manager documentation located on the DoconDisk). In Sage Pro 7.4, a Process ID can be assigned to users for displaying the Process ID that a process requires.

In order for a user to view the Process ID required for a process, the Process ID SMDSPPV must be assigned to a user. For detailed step, please follow the steps listed below.

Important
A user with ADMN level privileges is required to add this Process ID.

  1. Under the File menu ,click Change User Information; the User File Maintenance screen appears.
  2. Type an user ID into the User ID field.
  3. Select Privileges from the list, the Maintain Privileges screen appears.
  4. Click the List button, the Add Privileges from List screen appears.
  5. Click the Company ID picklist and select the appropriate company.
  6. Type the date range for the Process ID in the  Begin Date and End Date fields. Entry for these fields are optional.
  7. Type the time range for the Process ID in the Begin Time and End Time. Entry for these fields are optional.
  8. Click OK, the Select Privilege screen appears.
  9. Locate and select the Process ID  SMDSPPV.
  10. Click OK, a message box appears prompting the following "Merge with changes with other users?"
  11. Select either Yes or No.
  12. Select OK for the new privilege to take affect.

Once these steps are completed, a message will display the Process ID required to access a process.

Q – What information is contained in the PRO.INI file?

The pro.ini file can provide the following database information for a Sage Pro ERP installation:

  • Whether this is a Microsoft Visual  FoxPro (VFP) or Microsoft SQL Server (SQL) installation.
  • The name of the SQL server being used.
  • The name of the system database for the Sage Pro installation.

Important
Sage Pro may not function correctly when editing the pro.ini file.

The pro.ini provides three categories of information; profiles, Pro and database information. The first two categories provides build, edition and license information that applies to both SQL and VFP installations.
The last category provides database information. Listed below are the description for each database parameters provided in the pro.ini file.

Sage Pro 7.3B SQL Installation

 Parameter

 Description

 DBMS=SQL Server   

 Database system used by installation

 ServerName=[server name]\[instancename]

 SQL server name used by installation

 SysDatabase=PROSYS73B

 SQL server name used by installation

 Dsn=ACCPAC PRO SERIES  

 ODBC Data Source name used by installation

Sage Pro 7.4 SQL Installation

Parameter

Description

DBMS=SQL Server

Database system used by installation

ServerName=[server name]\[instancename]

SQL server or instance name used by installation

SysDatabase=PROSYS74

SQL server name used by installation

Dsn= ACCPAC PRO ERP

ODBC Data Source name used by installation

SQLMajorVersion= SQL2005 (new parameter for Sage Pro 7.4)

Type of SQL database used by installation

Sage Pro VFP Installation

Parameter

Description

DBMS=Microsoft Visual Foxpro

Database system used by installation

ServerName=xxx    

This parameter only applies for Sage Pro SQL installations

SysDatabase=PRODATA

Refers to the Database container name

Dsn= sss

Not used in a VFP installation

Additional information about the pro.ini file:

  • If the Pro.ini file is removed, the Pro.ini not found message will appear and the program will not launch.
  • If the Pro.ini file is removed prior to a reinstallation or conversion, the program assumes a new installation is being done. This may be indicated by the following message:
    The System and/or Temp Databases already exist 
    The installation should not prompt for these database names since they already exist, if the Pro.ini file is present.
  • If the pro.ini file contains invalid information, the following message will appear:
    Invalid User ID or Password or Could not connect to the database. 
    Please refer to solution 21377 for additional information.
  • The database information provided by the pro.ini file applies to Microsoft SQL Server. However it will indicate if the Sage Pro installation is using a VFP database by referring to the DBMS parameter.
  • Make a backup of the pro.ini file before editing the file.

Q – What are the possible causes of message “Invalid User ID or Password or Could not connect to the database” when logging into Sage Pro ERP using Microsoft SQL Server?

A – Important
This information should be reviewed by a Microsoft SQL Server Database Administrator (DBA) before implementing on a live system. This is provided for informational purposes only and is not supported by Sage Customer Support.
In order to use Sage Pro with SQL, each workstation needs an ODBC connection to SQL server. The ODBC Data Source is automatically added to the workstation when logging into Sage Pro with SQL for the first time. This will not occur when logging onto the workstation without the proper privileges, the ODBC Data Source will not be installed. This can be corrected by logging onto the workstation with Administrator privileges and then logging into Sage Pro with SQL. The required ODBC Data Source will be created and allow access to the program. Please refer to the list below for additional information regarding the ODBC connection:

  • The required ODBC Data Source is not manually added to the workstations. It is automatically added when logging into Sage Pro SQL for the first time with the proper workstation privileges.
  • Once the ODBC Data Source has been added, Sage Pro SQL does not require additional privileges on the workstation.
  • The workstation installation is not connected to this process.
  • The default name for the ODBC Data Source is "ACCPAC Pro Series" or "Sage Pro ERP."  However, this may changed during the initial Sage Pro installation. It is stored as the DSN in the Pro.ini file located in the Sage Pro root directory. This is the name of the System Data Source created in the ODBC Data Source Administrator.

In Sage Pro 7.4, SQL 2005 and SQL 2005 Express databases are supported. To use these databases, the TCP/IP protocol in the SQL Server Configuration Manager must be enabled. Follow the steps below:

  • Open the SQL Server Configuration Manager.
  • Click Protocols for [SQL Server Name]
  • Click TCP/IP.
  • Right-click TCP/IP and click Enable.
  • The following message appears:

    Any changes made will be saved; however, they will not take effect until the service is stopped and restarted.

  • Click OK.
  • Click SQL Server 2005 Services.
  • Stop and restart the SQL Server FullText Search, SQL Server, SQL Server Agent and SQL Server Browser.

The TCP/IP protocol for both SQL 2005 or SQL 2005 Express has now been enabled. Both databases can now be installed and used with Sage Pro. For more information on the SQL Server Configuration Manager, please refer to the SQL Server 2005 manual or a Microsoft SQL Server Database Administrator.

Back to Top^
Posted in July 2007, Newsletter | Tagged , , , , , , , , , , , , , , | Leave a comment

Florida International University & AXIS CRM Online Program Celebrates First Graduation Class

Over 12 months ago, AXIS set out to help their clients deploy successful CRM implementations.  “We were aware of the numerous research studies that yielded CRM implementation project failure rates ranging between 50 to 60%”, stated Manny Buigas, CEO.  The good news was that these same studies revealed that the adoption of CRM best practices resulted in outstanding return on investment (ROI) rates of 100% to 500%, with payback periods of a year.  We made increasing our clients’ CRM implementation success rates a priority. We understood that to accomplish this goal, we needed to bridge the gap between technology and our clients’ knowledge and readiness to deploy their solutions.

Based on numerous meetings with industry experts, we understood that to accomplish this goal, we needed to teach and empower our clients and consultants by designing a CRM strategy that was closely aligned with business strategies.  This one of a kind program was designed in collaboration with the Department of Marketing at the College of Business Administration at Florida International University (FIU) and Dr. Nancy Rauseo. This program combines real world expertise from CRM professionals and academic excellence from an accredited (AACSB) public research university.
We are proud to say that this dream has become a reality. The first group of certified CRM experts recently completed the online certification program. Here are excerpts of what some had to say about their experiences with the training program:

“It was a great course!  It has cemented my perception of customer service. Furthermore, it has given me new insights into business processes, the visions that drive them and their link to long term profitability along with techniques, tools and valuable sources of reference for assessing, analyzing and preparing any organization to improve its profitability by adopting and implementing a customer centric strategy.  It is my intention to develop a strategy for my company (electric utility) that can serve as a benchmark for similar utilities in the Caribbean.

Jerimie Lavinier
Dominica Electricity Services Company LTD
Roseau, Dominica

“Finally someone takes CRM beyond permutations of contact management and provides an in-depth study of the full scope of CRM!  With an excellent blend of academic foundation, hands-on insight, and ready-to-use tools and templates, this course is a must for anyone who is serious about developing a successful CRM strategy.”

Jeff Spardy
Marketing Consultant
Miramar, Florida

“The content was extremely diverse and comprehensive. Also, you took all the pain in compiling the tools and additional reading links. I can appreciate the quality since I was a faculty in pathology and a Fellow in Molecular Medicine. Those with academic background can better understand and more readily evaluate the depth and extend of the curriculum. Additionally, you provided tools, exercise and games increasing the value of the course.  All in all, it was extremely fulfilling experience to complete this course and it was a great learning experience too.”

Shashank Heda, M.D.
Irving, Texas

We are happy to announce that this online certification training course is now available any time.  Register to start your CRM journey today!  Whether you are local, out of state or in another country, this program can benefit you.  Your total investment for the program is $1,895. This fee includes

  • Maximum flexibility – CRM On-Line classes are now “open enrollment”. Sign up at your leisure and have 120 days in which to complete the curriculum.
  • Unlimited access to the course site for up to 120 days after the start date
  • Online facilitation & consultation for up to 120 days after the start date
  • Access to all printable materials, and more

For more information, please contact us at info@axisglobalpartners.com.

Posted in June 2007, Newsletter | Tagged , , , , , , , , , , , , , , , , , , | Leave a comment

How to Choose a Warehouse Management System

When it comes to choosing the right warehouse management system (WMS) for your business, it’s important to understand your warehouse needs and the benefits of having an integrated WMS before starting the selection process.  There are several key factors which should be addressed when considering move to a WMS system or an upgrade of an outdated WMS system.

Why should our company consider implementing or improving our current systems and processes?

Implementation of the latest technology can significantly improve employee productivity, warehouse operations, vendor relations and customer satisfaction.  Additionally as your company invests in new material-handling equipment such as carousels, conveyors and reach trucks, it should consider integrating these “islands of technology” with your WMS and accounting systems to optimize performance and maximize total warehouse efficiency.

Key factors that cause moves to new warehouse systems:

Requirements that customers place on distributors, is the primary reason that organizations look at improving their warehouse process.  These customer requirements and other influencing factors would include: EDI compliance, eCommerce requirements, and moves to new warehouse, acquisition of new warehouse equipment, RFID compliance and ASN compliance.

What is the first step our company should take to start the search for a warehouse solution?

The first step that should be taken in an organization that is looking to gain a competitive advantage would be to form a team to determine what the organizations needs are and what key features must be included in the system.  This team will also be responsible for determining the cost of doing business as the organization is currently operating.  Key indicators will need to be measured such as:  the number of picking errors, fines for mis-picks, predictive error rates, employee efficiency, returns material authorization costs, cost of repack or verification of orders, etc.  By measuring the organizations capabilities through benchmarking, an assessment should determine if the organization needs to implement significant changes to improve.  If so, then your organization should start on a search for improved warehousing systems.

Additional Steps to take before searching for a system:

In order to be prepared the following check list items should be considered before starting a search for a warehousing system

  1. Form a Team (discussed above)
  2. Document, Evaluate and Benchmark the Organizations current systems
  3. Develop a process and a timelines
  4. Share expectations and organizational needs.
  5. Create a list of functional requirements
  6. Consider integration to back office systems (accounting, sales, purchasing and customer relations management systems)

If you need assistance or would like more information on the steps needed to start the search for a WMS system, please feel free to contact us at info@axisgp.com.    To view previously published articles on warehouse management solutions please visit us at AXIS Newsletter Archive.

Hopefully this article has provided some insight on preparing your organization to begin a search to improve their warehouse operations to gain efficiencies.  Articles to come in the future:

  • July 2007 – Essential Warehouse Management System Features
  • Aug 2007 – Warehouse Management System Key Feature Check List
  • Sept 2007 – Picking a Software Vendor and Solution Provider to implement  a Warehousing System
  • Oct 2007 – Planning a Warehouse Management System Implementation
  • Nov 2007 – Implementing a Warehouse Management System
  • Dec 2007 – Utilizing your Warehouse Management System to increase efficiencies.
Posted in June 2007, Newsletter | Tagged , , , , , , , , , , | Leave a comment

How To Use Customer Item Numbers In Sage Accpac ERP

Sage Accpac ERP Inventory Control 5.4 lets you associate customer item numbers with your inventory item records. Customer item numbers are often required for large customers, where the customer uses their stock numbers when ordering from you. You may have any number of customer item numbers associated with a single item in your inventory.

Customer item numbers are particular to the customer and also specify the customer’s unit of measure, so different customers can use the same number for different items.
When you add a customer item number, you:

  • Choose the item from your inventory.
  • Specify the customer.
  • Enter the customers’ item number and their description of the item.
  • Enter the unit of measure.
  • Enter relevant comments and particular instructions for handling or shipping.

Note: Customer item numbers are available only in Sage Accpac 500 ERP.

Adding Customer Item Numbers

Inventory Control lets you associate customer item numbers with your inventory item records. Customer item numbers are often required for large customers, where the customer uses their stock numbers when ordering from you. You may have a number of customer item numbers associated with a single item if you supply goods to several large outlets.
Customer item numbers are particular to the customer and also specify the customer’s unit of measure, so different customers can use the same number for different items.
When you add a customer item number, you:

  • Choose the item from your inventory.
  • Specify the customer.

Enter the customers’ item number and their description of the item.

  • Enter the unit of measure.
  • Enter relevant comments and particular instructions for handling or shipping.

Customer Details Report

The Customer Details report lists the inventory items numbers that your customers use to refer to the goods that you sell, together with the numbers and descriptions of the corresponding item numbers.
The report features the following:

  • The item numbers used by your customers to identify items in your inventory system, along with the inventory item numbers that they identify.
  • The descriptions entered with each customer’s item number, and the unit of measure used by the item number

Print the Customer Details report, using the Customer Details icon in the Setup Reports folder, or choose Print from the File menu in the Customer Details form.

If you are interested in a document that details this process including step-by-step screen shots, please contact your AXIS Solution Provider for further information.

Posted in June 2007, Newsletter | Tagged , , , , , | Leave a comment

What is New in Sage Pro ERP 7.4 Accounts Receivable

In the latest release of Sage Pro ERP 7.4, there are 5 new features in the Accounts Receivable module. From the ability to print refund checks to a privilege to override the sales discounts, these new features provide flexibility, better reporting, and much more to this core accounting module.

The first new feature is the ability to print refund checks for customers from the Accounts Receivable module. Users can now create refund checks that can be applied to a credit memo or an open credit, which closes the credit memo or open credit. This function makes the credit management much easier than in previous versions.

The second new feature is the ability to print customer statements for national account customers. This statement combines all the open invoices for customers that are associated to a national account into one statement. All of the functionality of the customer statements is retained in this new feature.
 
The third new feature is a new privilege that allows a user to override the sales discount percentage. If this privilege is turned on, the user can edit or change the sales discount during invoice entry.

The fourth new feature is a transaction categories inquiry button. This will display a listing of the transaction categories that includes the General Ledger accounts that are associated with that particular transaction category. The transaction category inquiry button appears anywhere that the transaction categories are required. This gives the user a much clearer picture of how changing the transaction category will affect the General Ledger.

As we have seen, these new features provide the user with more tools that make the Sage Pro ERP 7.4 Accounts Receivable module more powerful than ever.

If you are interested in a detailed step-by step instruction document including screen shots, please contact your AXIS Solution Provider for further information.

Posted in June 2007, Newsletter | Tagged , , , | Leave a comment

Turning Local Media Placement into National News

By Ned Barnett, APR
Barnett Marketing Communications
 
Congratulations. Following the steps covered here in last month’s issue, you’ve just generated some good local coverage – and it may be that you think this news might interest national news media. That may seem impossible, but it’s not – except for breaking news, almost everything you see on TV or in national newspapers and magazines began as a “local” story. With the right story, you can do that, too. Here are several proven steps showing how you can do just that.
 
1.     First, obtain your local newspaper’s permission to echo this story on your web page. Obtaining that permission is often easy – if you offer them a valuable quid-pro-quo. A useful exchange is to offer the local newspaper full credit, complete with a prominent copyright notice and instructions on how readers can subscribe. You’re offering them free advertising, generally considered a fair trade for using an article.
 
2.     Pitch the national media via a brief, to the point e-mail, with a link to the page you’ve echoed (or if you didn’t get permission to echo the article, then a link to the newspaper’s article at their website). In this e-mail, invite editors to see your coverage – and tell them why, and how, this story belongs in their publication. Often, selling them on an interim step, such as an interview, or reviewing the local press coverage, or looking at some supporting research/facts that didn’t make the newspaper article is a good place to start.
 
3.     Following up that e-mail, call your highest-priority national reporters. Very briefly make the case why they should cover this story. If they are at all interested, send them a basically pre-written follow-up e-mail. Mention one point in the discussion that seemed to grab their interest, then try to hook them into coverage; or, if you think they’re still undecided, to an interview or some other interim step that will lead to coverage. Once they start investing some time into it, they gain increased interest (if only to justify their investment of time).
 
But how do you know if the reporters or editors you’re targeting are picking up on what you’re saying – especially in that phone call? Simple – obtain a copy of Jacques (Jack) Werth’s "High Probability Selling" (http://www.highprobsell.com ). Review Jack’s techniques and concepts for identifying really interested prospect. These techniques apply to phone pitching work such as this. For the executive who is handling PR as a sideline to running the business, High Probability Selling offers a wealth of useful tips and is an indispensable PR guide for me (I have both the book and the audio tapes). I find his techniques so effective that, for me, it is well worth a quick refresher before hitting the phones.
 
All of these approaches assume that you have a strong story that has obtained significant local coverage. But what if you can’t get local coverage on a story. Occasionally – with just the right story – you can generate national coverage that will help you bring the news back home. Here’s an example.
 
A local school and the community hospital put on a health training program for young school kids – those in grades K-3. The nurses used sock puppets to get their basic, but important message across. The school took a publicity photo, using the children of the school’s teachers to avoid problems with “permission.” This photo, along with a short paragraph about the program, was sent to a national nurse-education publication by one of the nurses. The magazine used it as human-interest filler – a newsworthy photo featuring cute kids is relatively easy to place. The school then went to the local paper – which had not been interested in the story originally – showing them this national coverage. The result –front page coverage, including the cute-kid photo – praising the school and the hospital for bringing national recognition to the community.

With the right story, with the right photo, it just might happen.
 
To conclude, congratulations on getting that important local newspaper placement for your story. That gives you a good platform on which to build some useful national coverage – or vice-versa.

Posted in June 2007, Newsletter | Tagged | Leave a comment

Understanding The Federal Family and Medical Leave Act (FMLA)

Part 1 – What is the Act and Is My Company Effected?

What is the Act?

FMLA became effective on August 5, 1993, for most employers. If a collective bargaining agreement (CBA) was in effect on that date, FMLA became effective on the expiration date of the CBA or February 5, 1994, whichever was earlier. FMLA entitles eligible employees to take up to 12 weeks of unpaid, job-protected leave in a 12-month period for specified family and medical reasons. The employer may elect to use the calendar year, a fixed 12-month leave or fiscal year, or a 12-month period prior to or after the commencement of leave as the 12-month period.

Who is required to comply?

FMLA applies to all:

  • public agencies, including state, local and federal employers, local education agencies (schools), and
  • private-sector employers who employed 50 or more employees in 20 or more workweeks in the current or preceding calendar year and who are engaged in commerce or in any industry or activity affecting commerce — including joint employers and successors of covered employers.

Who is covered?

To be eligible for FMLA benefits, an employee must:

  • work for a covered employer;
  • have worked for the employer for a total of 12 months*;
  • have worked at least 1,250 hours over the previous 12 months*; and
  • work at a location in the United States or in any territory or possession of the United States where at least 50 employees are employed by the employer within 75 miles.

For more information on the Family Medical Leave Act of 1993, please click on the following link to download an article from the U.S. Department of Labor

Click here to download the pdf.

Or access the website at http://www.dol.gov/esa/regs/compliance/whd/whdfs28.htm

Best Practices for Compliance:

The Federal Family and Medical Leave Act (FMLA) provides benefit protections your employees value, but it can also create confusion regarding key FMLA requirements, the implications of noncompliance, and the best ways to mitigate compliance risks.

Most employers who have 50 or more employees rely on HR or Time and Attendance software to manage and track employees whom are covered by FMLA.  FMLA can work on different tracking methodologies from Calendar Year, Corporate Fiscal Year,  Employee Year or 12 month rolling period measured backward from the date leave is used.  Since employees can use leave intermittently or only a few hours a week and the law provides for a concurrent 12 month period, most employers cannot manage tracking the leaven taken and eligibility in an Excel spreadsheet.

If you would like more information about FMLA or other HR benefit tracking issues, please contact us at info@axisglobalpartners.com to schedule a consultation on employer best practices for HR Management.

Posted in June 2007, Newsletter | Tagged , , , , | Leave a comment