In Sage Pro ERP 7.4 there are 3 features that enhance the data management capabilities and provide users with more flexibility and control over the data then ever before. It is important to note that only users with the correctly assigned user privileges are able to perform these tasks.
The first feature is the ability to import Sales Orders, Purchase Orders, and Inventory Control Receipts from external files. The tables are updated using Sage Pro ERP 7.4’s business logic and thus it is transparent as to whether the Sales Order, Purchase Order, or Inventory Control Receipts was entered manually or via the import. Additionally, users can save and reuse the field mapping schemas used for importing
For the purpose of this article, the Sales Order import will be used as an example. The import for Purchase Orders and Inventory Control Receipts function the same way.
To import a file into a Sales Order, from any module (other than the System Manager module) select File > Import > Sale Order.
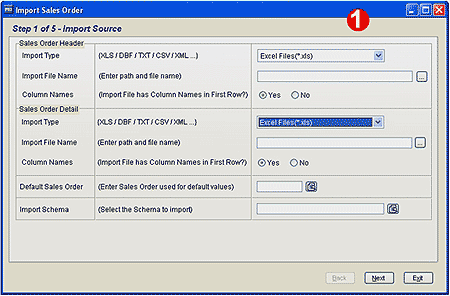
1. The first step is to enter the import source.
First, the Sales Order master file external file needs to be selected. Enter the type of file, which can be an Excel spreadsheet, a Visual FoxPro table, a text file, a comma delimited file, or an XML file. In this article we will use an Excel file. Then, select the path and the file name of the external file.
Secondly, the Sales Order detail file needs to be selected. Enter the type of file, which can be an Excel spreadsheet, a Visual FoxPro table, a text file, a comma delimited file, or an XML file. (In this article the Excel file will be used as an example.) Then, the user will select the path and the file name of the external file.
Now, the user needs to decide if there is a Default Sales Order that you want to use. This will determine the default values. It is not necessary to select a Default Sales Order.
And lastly for this step, the user will select an Import Schema or leave this blank if the standard Import Schema will be used.
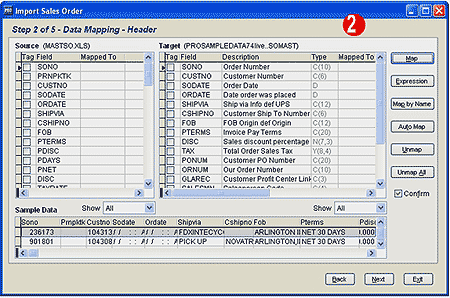
2. The next step is to map the header record.
The header record is also known as the master record and there is one master record per sales order. On the left side is the file that was selected in the previous step (which is identified as the source) and on the right side is the Sales Order master file (which is identified as the target). At the bottom of the screen is an example of what the data looks like based upon the import file. This is a where a review of the import data can occur and will show how the fields in the import file line up with the target tables. Next to the Sales Order master file are a series of buttons. These buttons allow the user to select the mapping criteria. The mapping criteria selection is as follows:
Map: Allows the user to go field by field and map the fields on the left side to the fields on the right side.
Expression: Allows a more sophisticated user to write programming expressions to map the fields.
Map by Name: Allows the user to match the field names from the source file to a field in the target file with fields that have the same name.
Auto Map: Allows the fields of the target file to be mapped to the fields in the source file in the order that the fields are listed.
Unmap: Allows the user to de-select the mapping field by field.
Unmap All: Allows the de-selection of all the mapped fields.
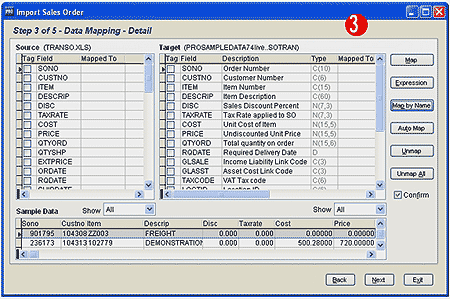
3. The next step is to map the detail record.
The detail is also known as the transaction record and there can be many transaction records per sales order. On the left side is the file that was selected in the previous step (which is identified as the source) and on the right side is the Sales Order transaction file (which is identified as the target). At the bottom of the screen is an example of what the data looks like based upon the import file. This is a where a review of the import data can occur and will show how the fields in the import file line up with the target tables. Next to the Sales Order transaction file are a series of buttons. These buttons are explained in Step 2.
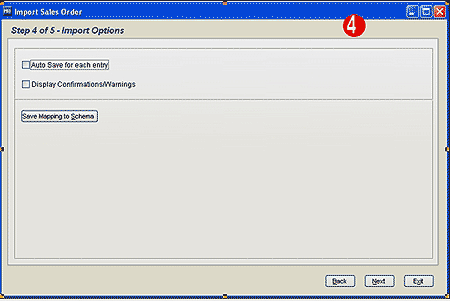
4. The next step is to select the Import Options.
Auto Save for each entry: If this is selected, then the user will be prompted to save each line and each sales order. If it is not selected, then the system will do the save automatically.
Display Confirmations/Warnings: If this is selected, then the user will be prompted for each confirmation and warning.
The Save Mapping to Schema allows the user to save this mapping for additional imports.
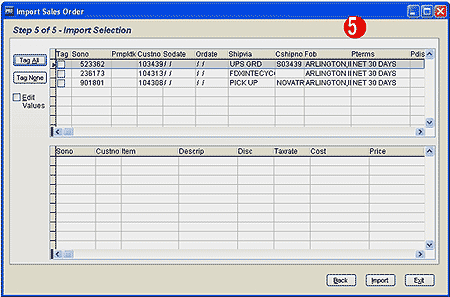
5. The final step is to select which records to import.
The Tag All button selects all the records while the Tag None button clears all the selected lines. If a user wants to change the information in a field, the user will select the Edit Values and make the change right here.
When the user is satisfied that all the data is ready, they will click on the Import button and the records will be imported into Sage Pro ERP 7.4.
___ … ___ … ___
The second feature that enhances the data management capabilities is the redesign of the customer, vendor, and item history files to retain details for an unlimited number of periods. Balances are now linked to fiscal periods rather than period close and can be recalculated whenever required.
For the purpose of this article, the customer history will be recalculated. The vendor history and item history recalculation process is the same as the customer history. This changes the 24 month rolling window that users see when the History Inquiry is selected. The default is the most recent 24 months (for example March 2006 to March 2008). If the user wants to see March 2004 to March 2006, they would do the recalculation. A user might want to do this so they could use the charts and graphs available in the History Inquiry.
In the System Manager module, select Transaction > System Recovery > Recalculate History > Customer.
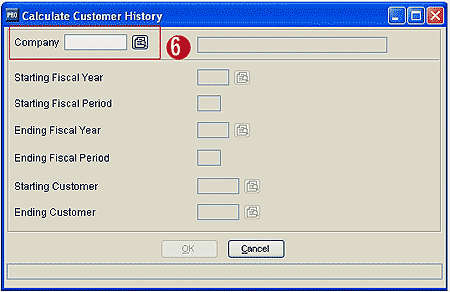
6. Enter the company ID.
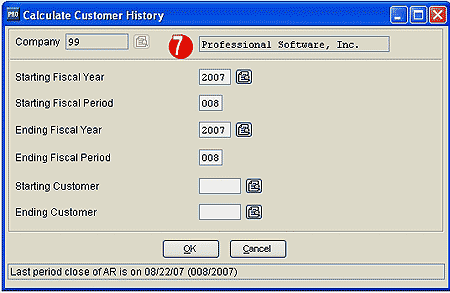
7. Enter the new Starting Fiscal Year, Starting Fiscal Period, Ending Fiscal Year and Ending Fiscal Period. If the recalculation is for all customers, leave the Starting Customer and Ending Customer blank otherwise enter the customer number. Click on OK and the recalculation will be completed.
___ … ___ … ___
The third feature has been eagerly anticipated by the Sage Pro ERP community. How many times has a user, without realizing it, entered the same customer under two different customer numbers or entered the same vendor under two different vendor numbers? Now, there is the ability to combine codes for two customers or two vendors. There is even a provision to handle duplicate invoice numbers when merging vendors. For the purpose of this article the vendors will be used as an example.
In the System Manager module, select Transactions > Merge Key > Enter Merge Key > Vendors.
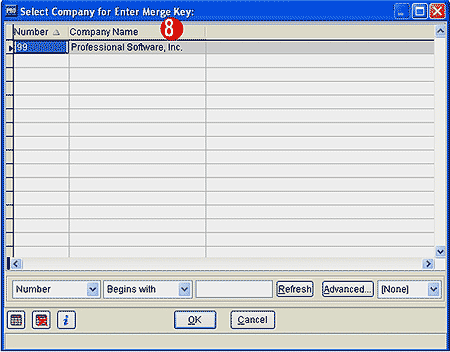
8. Select the company ID that has the vendors that are going to be merged.

9. Select the order that the vendor numbers will appear.
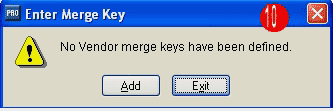
10. Select Add to begin the process.
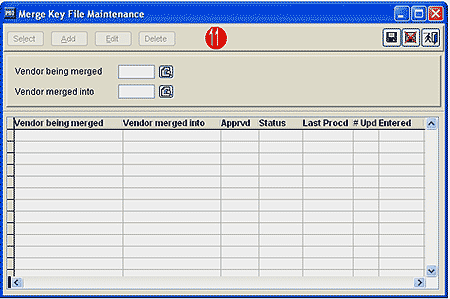
11. Enter the vendor number that will be merged. When the merging process is completed, this vendor number will no longer exist. Then, enter the vendor that is going to get all the information (invoices, payments, etc) from the first vendor.
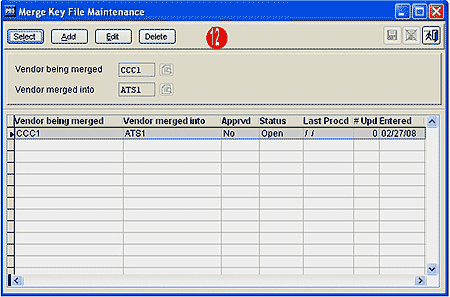
12. The grid will show data is being merged into the vendor. Select Transaction > Merge Key > Approve Merge Key > Vendors.
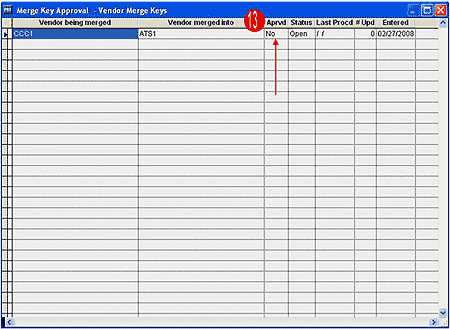
13. Note that the column labeled Aprvd is No. This is the approval column. To approve the merger of the vendors by highlighting the row and press the space bar.
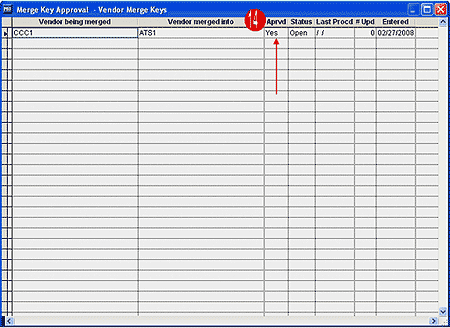
14. The Aprvd column has now changed from No to Yes. Press the Enter key and the approval process is completed.
The next step in the merging process is to actually merge the approved keys. Select Transaction > Merge Key > Process Merge Key.
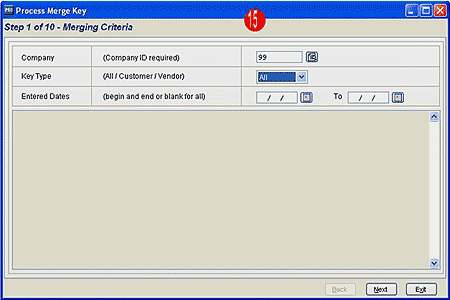
15. Step 1 in the merging process is to select the Merging Criteria. Select your company ID, key type, and date the merge key changes were entered. The date can be left blank.
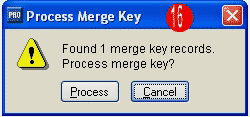
16. The user will be prompted as to how many merge key records were found. In this example there is only 1 merge key, so click on the Process button.
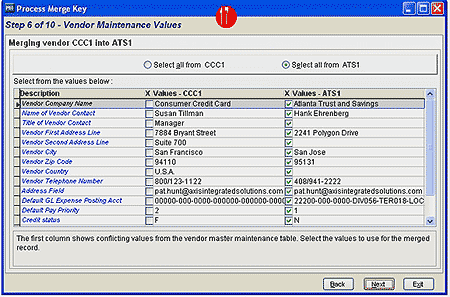
17. If there are conflicts, the user will be prompted to select which values to use for the merged file. All the values from one vendor or the other vendor can be selected or the user can pick and choose. In this example the values that will be chosen are from the vendor that is being merged into, not the other vendor. Click on the Next button when the values are correct.
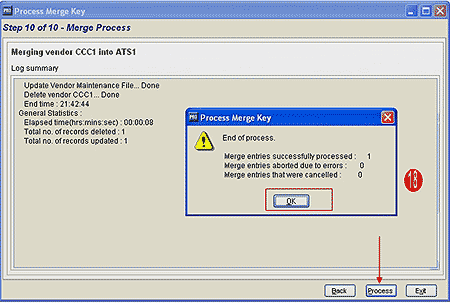
18. The actually merging of the vendors will occur once the Process button is selected, so it is critical that the user is certain that these vendors should be merged because once the process has begun there is no turning back.
After the vendors have been merged, a log appears as well as a screen showing the number of successful processes, the errors, and the cancelled entries.
___ … ___ … ___
By giving users the ability to import Sales Orders, Purchase Orders, and Inventory Control Receipts from external files, retain details for an unlimited number of periods for the customer, vendor and item history files, and merging two customers or two vendors the data management has become easier, more flexible, and user control.
If you have any questions or need additional assistance, please contact your AXIS consultant or email us at info@axisgp.com for more information.


 Download our corporate brochure for more facts about us, our
clients and our solutions.
 Driving Revenue Growth 1
 Satisfying Customers 1