
Sage Accpac ERP 5.4 has quite a few new features pertaining to the customer information in the Accounts Receivable module. We will look at three of these features that make the customer information more flexible and easy to navigate.
The first feature allows a user to automatically use the customer’s salesperson information when setting up a new ship-to location for the customer. This makes it easier for the user to set up the ship-to location without being concerned about entering the salesperson. Yet, it is flexible enough so that different salesperson information can also be entered.
Select Accounts Receivable > A/R Customers > Ship-to Locations.
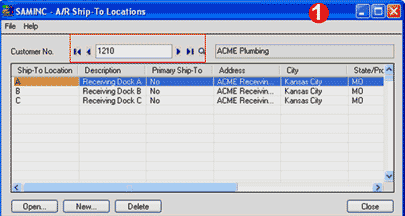
1. Enter the Customer Number that will have the new Ship-To Location.
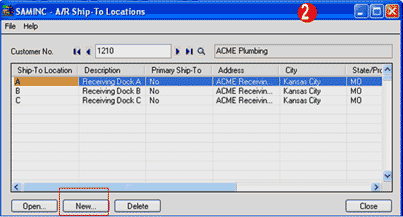
2. Click on the New button at the button of the screen.
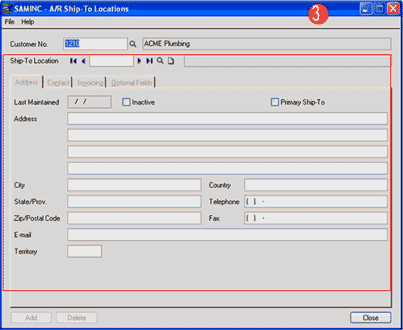
3. Enter a unique Ship-To Location code for this customer and fill out the address information for the Ship-To.
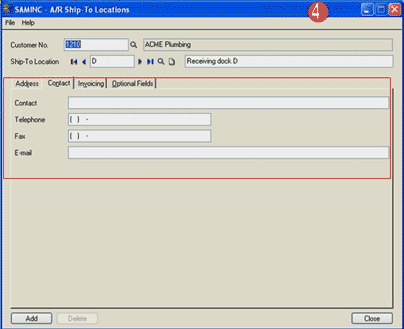
4. Enter the Contact information for this Ship-To Location.
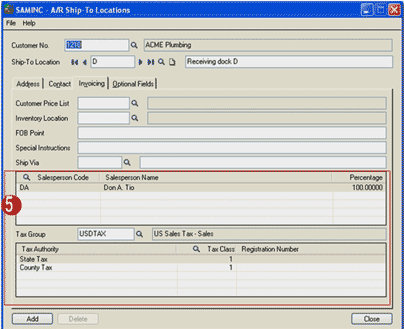
5. On the Invoicing tab, note that the Salesperson Sode and Tax Group are a default from the customer information. You can change the salesperson and the tax group if they are different than the customer. Enter the Customer Price List, Inventory Location, FOB Point, any Special Instructions, and select the Ship Via for this Ship-To Location if applicable.
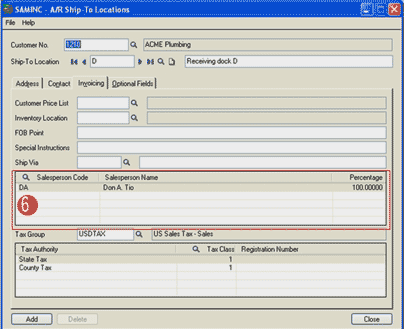
6. To change the Salesperson Code, click on the line with the incorrect Salesperson Code and a list of salespeople will appear. Select the correct salesperson. Note that you can enter up to five salespeople if that is required for this Ship-To Location.
If the Tax Group needs to be changed, then select the correct Tax Group. When the Tax Group is correct, click on the Add button and this Ship-To Location is added.
The second feature allows users to set up a default inventory location for the customer. Just like we can select a default inventory location for the ship-to location, we can specify a default inventory location for the customer so that goods are shipped from the nearest warehouse location. This feature can help in reducing shipping costs and provide faster delivery for customers. The inventory location can be overridden in Order Entry if the user has the proper privileges.
Select Accounts Receivable > A/R Customers > Customers.
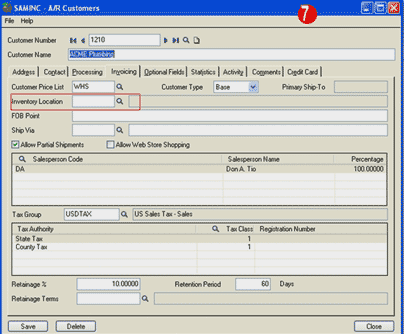
7. Whether you are entering a new customer or want to edit an existing customer, the default Inventory Location is selected the same way. On the Invoicing tab there is a field called Inventory Location, click on the finder to show the options for Inventory Location.
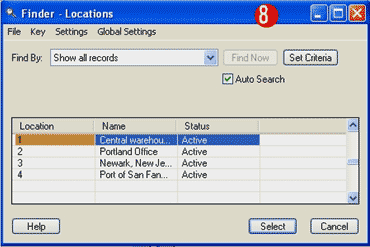
8. Highlight the Inventory Location and click on the Select button at the bottom.
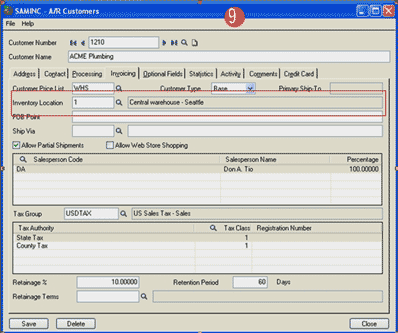
9. The default Inventory Location is set. If you are finished, click on Save.
The third feature of Sage Accpac ERP 5.4 is the ability to save the selections you make to view transactions within Customer Activity so that they can be used as defaults. This saves time when the same criterion is used on a regular basis.
Select Accounts Receivable > A/R Customers > Customer Activity
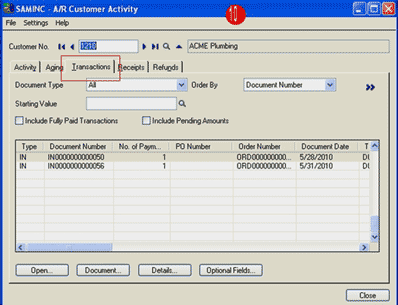
10. Enter the Customer Number or click on the Finder to locate the correct customer and click on the Transaction tab. In this example, the default is Document Number order, which is setup in A/R Options.
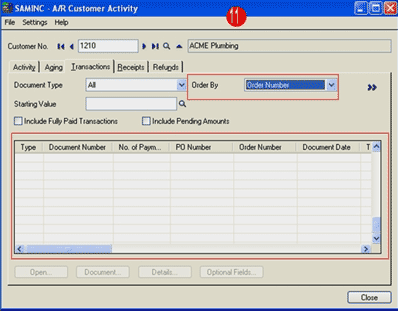
11. If you want to see the documents in Order Number order, click on the pull down and select Order Number. Please note that there are no documents listed. The documents won’t show up until you either tab over or click on the double arrows.
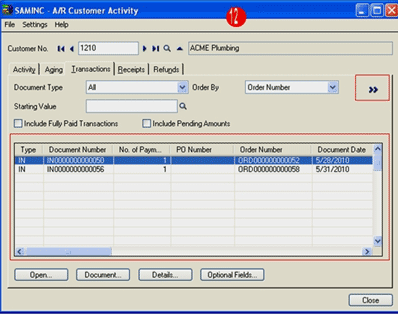
12. The documents are now sorted in Order Number order. You can select more criteria by looking for a particular document type (i.e. invoices), or a starting value, and so on. Once you have set the criteria, you may want to use these new criteria as the default for this customer activity.

13. Click on Settings at the top of the screen. You will have 2 options:
1. Save Settings as Defaults
2. Clear Saved Settings
If you select Save Settings as Defaults, the criteria that you entered will now be the default every time the Customer Activity is accessed. If you decided that you don’t want to keep these as defaults after you have saved them, click on Settings at the top of the screen and select Clear Saved Settings.
By utilizing these features, the entry and lookup of customer data is streamlined and easy to use.
If you have any questions or need additional assistance, please contact your AXIS consultant or email us at info@axisgp.com for more information.


 Download our corporate brochure for more facts about us, our
clients and our solutions.
Download our corporate brochure for more facts about us, our
clients and our solutions.
 Driving Revenue Growth 1
 Satisfying Customers 1